Text editor is the essential tools for programmers. As you know, there are so many text editor out there. There are Notepad ++, Visual Studio Code, Sublime Text, Atom, Brackets, etc. But, I and many people out there choose Vim as our text editor, since it is highly customizable for our programming purpose.
This is a rewritten version of an article originally published on [dev.to](How to Configure Vim as Your Main Python IDE - DEV Community), with some slight enhancements.
What is Vim?
For those of you who don’t know, Vim is a text editor, not an IDE. but, don’t get me wrong. Vim is more than just a text editor. We can make Vim works like an IDE. I wouldn’t explain what makes Vim special here. You can watch about that in this video:
Altough Vim is very good for coding, it doesn’t look like that at the first time. When you first installed vim and open it, it will look like this:
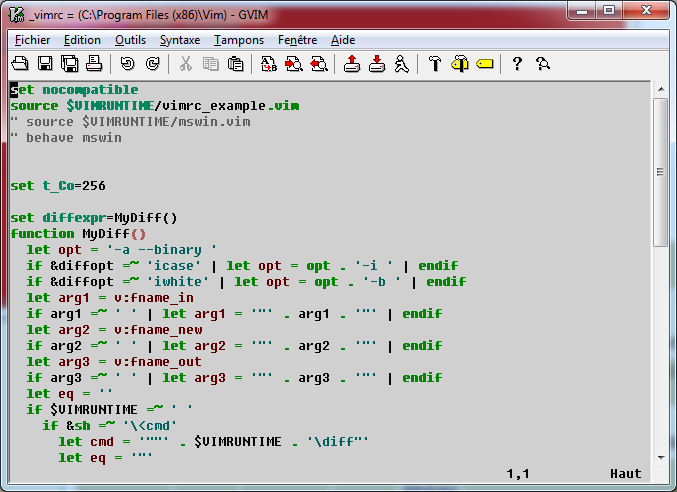
Not bad, right? but, since we will using Vim as our main text editor, we need a better UI Design. this is my Vim text editor after configuring it:
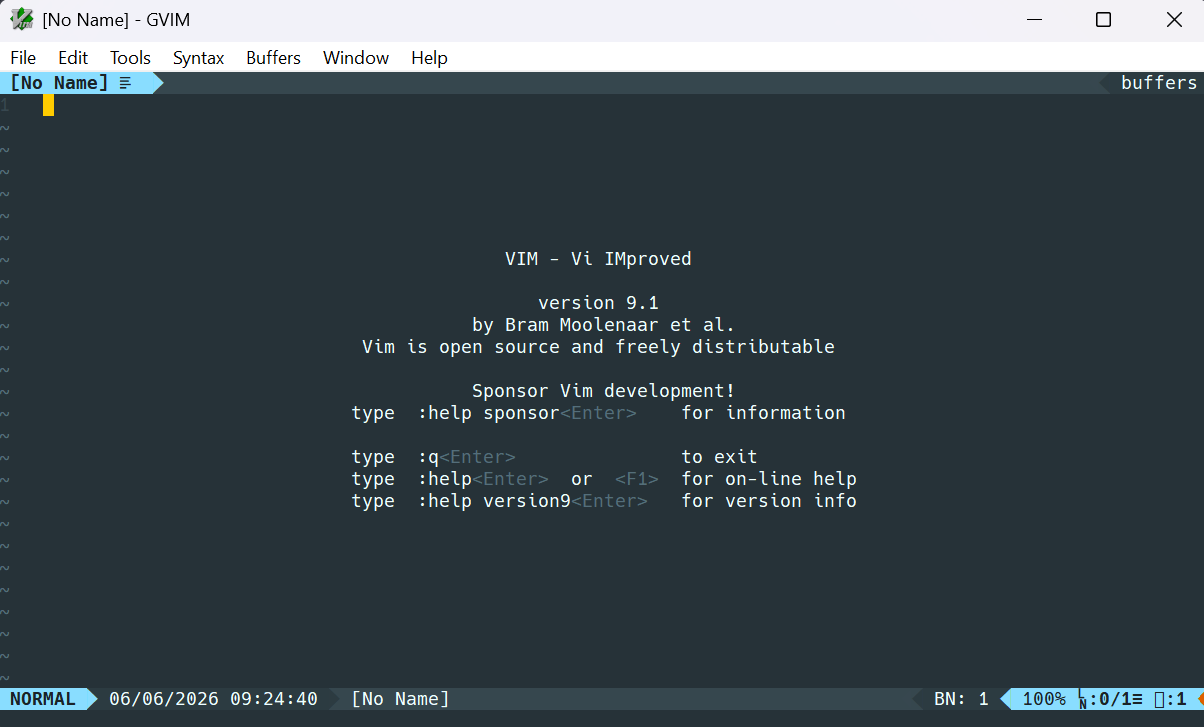
So, how do we make vim looks better ? here is some configuration for vim that i think are important:
Auto Indent
Auto indenting feature is so important if you are writing code in programming languages that care about indenting, like python. to enable auto-indent feature, you can type :set ai (ai stands for auto-indent) in normal mode. If you want this feature enable for every file you create, you can add set ai (without colon) in your _vimrc file (for windows user).
Syntax Highlighting
For some coder, syntax highlighting is an important feature. syntax highlighting feature makes us understand the code easier. To enable syntax highlighting in vim, open your _vimrc file, and add this text : syntax on.
Turn Off The Bell
When you are using Vim for the first time, you will notice that there is a bell sound when something wrong happen. For me, this is so annoying. To turn off this sound, add set belloff=all to your _vimrc file.
Line Numbering
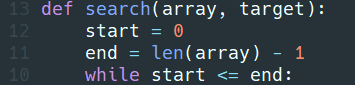
What i mean by line number is the number for each line at the left side, jus like the image above. To display line number in Vim, add set number to your _vimrc file. If you want relative numbering, add set relativenumber to your _vimrc file.
Matching Brackets and Quotation Marks
When you use VS Code, Atoms, and other text editor, when you type (, you will see that ) also appears automatically. But, when you use Vim, you wouldn’t see this feature by default. To enable this feature, add inoremap ( ()<Esc>i to your _vimrc file. You can do the same thing with quotation marks. So, to enable this feature for every brackets and quotation marks, add this code to your _vimrc file :
inoremap ( ()<Esc>i
inoremap { {}<Esc>i
inoremap [ []<Esc>i
inoremap ' ''<Esc>i
inoremap " ""<Esc>i
Change Theme In Vim
Themes in Vim are called as colorscheme. After installing vim, you will also get some Theme/Colorscheme by default. To change the colorscheme that applied in vim, type :colors an then press tab button. then you will see something like this :

This is the menu for choosing vim colorscheme. you can use arrow keys to navigate between it and press enter to applied that colorscheme. To add new colorscheme, you can search it in github. The coloscheme that i personally use is material colorscheme. to Use this colorscheme, download the file in colors folder and place it to vim82 -> colors in your vim folder. After that, you can applied that colorscheme like usual.
Vim Built-in Autocompletion
Do you think vim can’t perform autocompletion? Vim have its built-in autocompletion named Omni Completion.
Omni completion provides smart autocompletion for programs. When invoked, the text before the cursor is inspected to guess what might follow. A popup menu offers word completion choices that may include struct and class members, system functions, and more. A similar feature in Microsoft Visual Studio is known as IntelliSense. - Vim Fandom
In Order to enable this feature, open your _vimrc file, and write :
filetype plugin on
set omnifunc=syntaxcomplete#Complete
After this step, you can start typing your code. if you want the code suggestion to pop-up, press ctrl-x and ctrl-o.
Cool Statusbar
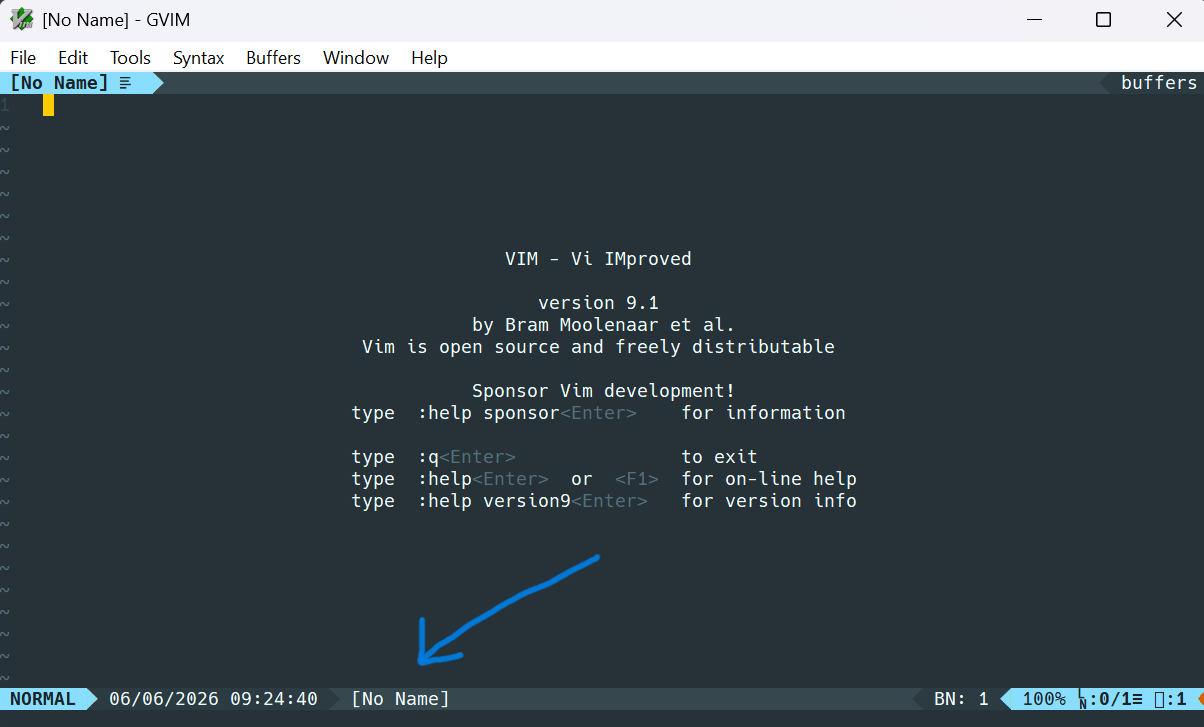
The cool blue line in the bottom of my Vim layout at the screenshot above is called statusbar. There are some plugins that you can use to make your statusbar looks better. For example, vim airline and vim lightline. I myself use vim airline for my statusbar. To install this plugin, you can use some plugin-manager that you prefer, like vundle or vim-plug. But, if you use Vim 8, you can use vim native package manager. To install vim airline using vim native package manager, do this step :
- go to vim airline’s repository
- download the entire repository in zip file format.
- extract this zip file
- go to you vim folder, and open
vimfilesfolder, and openstartfolder (if you don’t see this folder, then create it). - place the extracted zip file to this
startfolder. - done. you already have install vim airline.
After that step, your vim statusbar better. you can also add this code to your _vimrc file (optional). I don’t know what exactly this code does, but it looks like this code make your statusbar display the file extension and current time.
let g:airline_section_b= '%{strftime("%c")}'
let g:airline_section_y= 'BN: %{bufnr("%")}'
let g:airline#extensions#tabline#enabled = 1
read more about vim native plugin here .
File Explorer
Actually, vim has file explorer by default. but, for some reason, i prefer to use NERDTree, a plugin for file explorer. Check this repository. Installation for this plugin is the same to the installation Vim airline plugin. After installing this plugin, you can open file explorer using :NERDTree command in normal mode.
Better Syntax Highlighting
As I said before, Vim have built-in syntax highlighting feature. But, it is not too good. If you want a better syntax highlighting for python, you can use python-syntax plugin. The installation process of this plugin is the same to the installation vim airline plugin. After installation finished, you can use this plugin by add this code to your _vimrc file:
let g:python_highlight_all = 1
Terminal
You can open your terminal directly in Vim text editor. You don’t need to install anything. To open terminal in Vim, type :terminal or :term in normal mode.
Running Python Code
Actually, you can run python code in vim using terminal and type python example.py. But, if you want to run python code by pressing keyboard, then follow this step. first, open you _vimrc file. then, write this code:
nnoremap <F10> :! python %<CR>
What this code does is mapping f10 key to run :! python %<CR> command. In general, the command :! python %<CR> will take the name of your file using symbol % and then run it like you run it manually in the terminal. After this step, you can run python code by pressing f10 on your keyboard. Do you know what to do if you want to run python code by pressing r key ? Yes, just write nnoremap r :! python %<CR>.
So, that is some configuration to make vim. In case you want my _vimrc configuration, check my repository. Thanks for reading!